I wanted a 15V battery pack for my Elecraft KX3, made with NiMh AA batteries. To get 15V, I needed 11 NiMh cells. There are very few sources of 12 cell AA battery holders. For a while, I’ve used two 6-cell holders with 11 AA cells and one dummy cell. I thought it would be interesting to make an 11 cell battery holder…
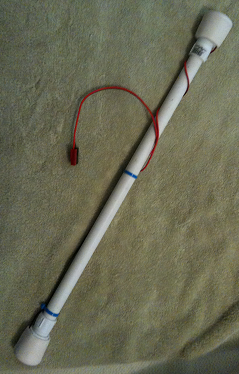
This isn’t exactly how I did it, but it is how I would do it, if I were to do it again.
Ingredients:
- 19-1/4” length section of 1/2” schedule 40 PVC pipe. 1 @ $2 (I had this sitting around the house, so I just estimated its price.)
- 3/4”x1/2” PVC male adapter. This fits over the outside of 1/2” pipe, giving it 3/4” male threads. 2 @ $0.66 each
- 3/4” PVC screw cap. 2 @ $1.26 each
- #6-32 machine screw, 1/2” long, with nut, plus 2 extra nuts. From one package with several screws. $1.18 for the pack.
- One negative terminal spring, removed from a AA battery holder. Be sure to grab one that has a small circle inside the big end. These things are sorta cone shaped. If you find the right one, it will be riveted inside the large end, and and there will be a small circle of wire inside the large end, with a rivet through it. You just have to drill out the rivet. $2
- 2 ring terminals, sized to fit #6 machine screw, from supplies. $0.10
- 2’ red/black zip line, 18 gauge, from supplies. $0.30.
- 1 pair of PowerPole connectors, from supplies. $1.25.
- 1 pair of 1-1/4” rubber chair leg tips. $2.79.
Instructions:
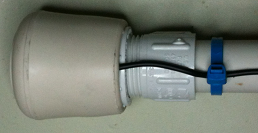
- Press the PVC male adapters onto the end of the pipe. You’re supposed to glue this stuff. I found that tapping them on with a mallet puts them on solidly enough to hold. (I wouldn’t do this with pressurized pipe, but the fit pretty snug. You can glue them if you wish.)
- Drill a hole in the center of the screw caps, sized so that the #6 machine screws screw into it tightly.
- Screw one #6 machine screw through the cap, with the screw head inside and the screw end outside the cap.
- Screw the other #6 machine screw through the small circle inside the large end of the battery spring, then through the other cap, from the inside to the outside.
- At this point, you have two caps with the ends of the machine screws sticking out. Screw one nut onto each. Tighten the nut securely.
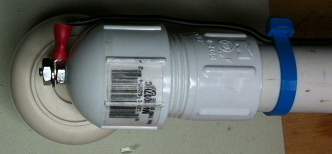
- Solder a pair of ring terminals onto one end of the zip wire.
- Crimp PowerPole connectors onto the other end of the zip wire.
- Fasten the ring terminals onto the machine screws, using another nut for each machine screw. Use a washer too, if you like.
- Screw on the cap with the spring.
- Insert your batteries,
- Screw on the cap without the spring.
- Push the leg tips over the caps, to cover the screw ends.
- Bask in the glory of a job well done.
Update (2017): I replaced the chair leg tips with large diameter heat-shrink tubing. Tubing weighs less than the chair tips.
It is a little on the heavy side. For comparison:
- My existing 12-cell holder: 16 ounces
- My LiFePO4 battery pack: 12 ounces
- Power wand (without the chair leg tips): 16 ounces